Monday, December 17, 2012

Rock On. Seriously it is.

It's amazing what some stone can do to the look of a construction project.  All of a sudden I feel like we have a house.  It makes it feel sturdy and secure or something and I guess that is what we all want in the place we call home.  In this case it happens to be the sturdy and secure feeling of the structure and not what we ultimately desire (a sturdy and secure  home life).

Warning: there is a serious case of the "vents" below


 I'm not gonna lie...
If you've been following the pics I've posted on the Hill Country Homebody facebook page you've already seen many of these pictures and updates.  You have also probably heard some desperation in my typing.   I try to keep my posts about us building more on the informative side than the emotional because well...I'm embarrassed to complain.  I mean come on!.. We chose to buy this lot a few years ago to take this on.  We chose to live in a fairly nasty little rent house, we chose over the last few years to pinch our pennies even more than we already did, we chose to not buy new things, or take vacations, or send our kids to private school, or have more than one in mothers day out at a time, and for me to keep working part time for probably forever(and I'm actually cool with that..it's good for this mommas mind).  The truth is at many different points on this journey we have thought "uhh this may not be the right thing for us".  Then we sit down and punch numbers and every time we end up realizing that we could sell the lot, lose some of our hard earned dough and move on or we could just build it and decide if this is the life we want to live or we want to sell it and make a little dough and do something totally different.  Like live on a farm in a small house and just be stinkin content with the space we have. (my kids would insert "mom that's a bad word"here)
Yes I said it.  The five of us are in a 1500 sq foot house right now and you know what it is kind of nice.    Why do we feel like we need so much space?  The truth is we are building what is probably an average  sq foot home if you check into the average new build in this area.  It will be 2800 sq feet(I'm actually embarrassed to type that too) We honestly have tried to keep the sq. footage down while still getting the spaces that seemed most important to us.  I can't help but to feel uneasy about where we are putting our $ when there are so many people in need.  And then again we punch the numbers and because this area continues to grow and become more and more expensive we wouldn't save all that much if anything by doing something much different at this point because we purchase several years back.  I also always feel better when the Property Brothers are on and I see what people are having to fork out in other areas and even here to have a roof over there head.  Truth be told our house would be considered a bargain to many.  So that's how I then begin to justify it.  Right or wrong that's what is going on in my head lately.    I'm struggling with it all. 

So that being said this process has been anything but smooth.  We were suppose to be in the house in October and now it's the end of november.  We are slowly but surely draining our savings as we purchase things on our own (because we know we will need them in a jiffy yet we haven't received any allowances from the builder), pay month to month rent and interest on the construction loan.  We then had a transmission go out on a car and needed new tires on the other one at the same time:(  Now..it's the season of giving and we feel like we have little left to give.  It's insanity and we dove right in ourselves.  No one pushed us.  Had we only known. 

The stress has been ugly.  I just want to go to work and then come home and be with my family.  Instead we are in a constant state of decision making and quality control.  I've heard it can be like this.  I think we may have an extreme case of it at this point.  Nothing is done when it's suppose to be and there have been lots of ugly words because of people not holding up their end of the contract.  The other day the hubs said "I just want to finish it, sell it and never think about it again".  And then...we get a grip and remember that someday(hopefully soon) this part will be a distant memory and we can move on with life whether it be here or in a bunkhouse on a farm (I kid you not that sounds romantic to me).

When you build you become "the couple that is building".  Friends please don't feel bad for asking I would do the same thing.  Everyone wants to know "so how's the house coming"?  We feel like we have lost our identity.  Now I know I'm venting at the moment but hubs and I don't like to complain or make others uncomfortable.  Almost to a fault.  We want to say "it's coming along" but that would be lying. Yet who wants to talk to the people that just complain about how stressful it is to build their dream house.  So it's hard to find the words. Gag! 


Ok...So I feel better.. kind of?  Do you?  I didn't think so.

I do like this kind of thing believe it or not;).  Why else would I blog about my adventures in making our house a home and building if there wasn't something about it that I enjoy?  When things do happen and decisions work out I get some kind of thrill out of it.  It's always been that way for me.  Like when I ripped out the carpet in my room and painted my concrete floor to my moms dismay when I lived at home..Sorry mom and dad.  It looked pretty good though;)
So please don't think (or know) that I'm crazy when I act like I hate everything about this project and then you see a post from me about "Woohoo the lights are in!".  There ARE parts that are fun.

One of those fun days was when I went out to the job site the day after meeting with the mason to find this beautiful stone wall.
I loved it.  
It was better than I had imagined and all of the decision making about what kind of stone and how to lay it had paid off.  This of course didn't go off without a hitch.  The sizes weren't the same size as the picture we had given the contractor and there weren't enough of one size in particular (the 6") stones so we had to improvise.  This was one of those occasions when we just had to roll with it or it would hold it all up even longer.


We went with a linear pattern in a stone called Sonoma Tan.  It is actually more tan than the display wall at the stone shop but stone is tricky that way so what can you do.  I still love it.  The sizes are 10", 6", and 4".  There should have been a equal number of 8", 6" and 4" but oh well.


 We decided not to have a header of stone over the windows but to have the 6" ones as window sills if you will.


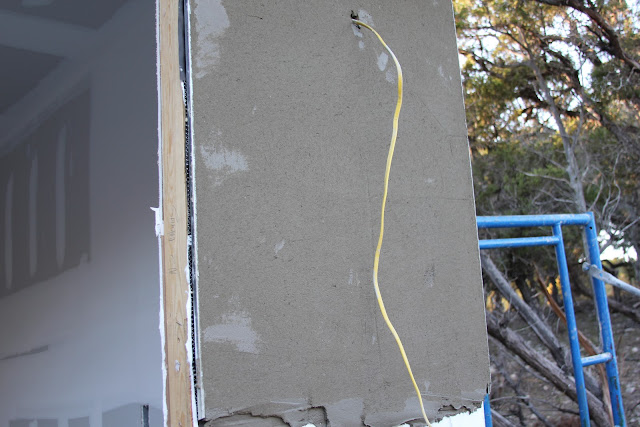
As the stone was going up they realized the lights were too low and had to move them before the stucco crew came back out to finish.


Once the masons were gone and we went to check it out we noticed they didn't stone two of the columns.  We looked up the plans and sure enough it's on there to have stone on each column so now they have to come back out to do that and to veneer the chimney.  

Below is the skim coat of stucco and the final coat actually contains the color which is Sherwin Williams Anonymous SW7046 and in case your wondering we went with Sherwin Williams Porpoise for the trim.


Your still seeing the skim coat here not the color.


Here's my guy trying to give me an idea if these industrial lights are a good look and a good size.  


They are a really inexpensive industrial looking exterior light that I found here:


We tried them in different areas.  I was afraid they would be too small on either side of the garage.


So we also tried this industrial exterior barn light and decided that's the direction we would go with the other lights around the casa.


So that means the exterior lighting is picked..That's an accomplishment.  We didn't order all of them so I better hurry before you guys scoop them up;)

And on the inside...
Well we have paint.  With that we also have concrete floors that are to be stained that have paint all over them.  That part ain't so smart(excuse my Texas twang).  There were many many conversations about protecting the floors and it didn't happen.  
Ah...Breath in, Breath out.

More on paint later but for now I will leave you with a picture of the pantry.  Just because it is one of those spaces I'm excited about.  It has it's own little window ya'll.  How could I not be excited about a pantry with a window?


My friends if you order the lights from the Amazon links about I will receive a small perk.  

Photobucket

Friday, November 30, 2012

A meaningful Christmas

Hi Folks.  It's Friday and that is a good day around here.  I am off on Fridays now which allows me to have some one on one time with our shortest short person!


We are attempting to get into the Christmas spirit in the midst of not knowing if we are moving anytime soon or not and having most of our decor in unreachable places in the garage.

This year we decided to change it up since we won't be getting all of our Christmas decorations out.  We donated our artificial tree a while back because different sections of lights were out, we had had it for about 8 years and it was taking up precious garage space.
So in instead of buying a real one that we may have to decorate, undecorate, and move we opted for this precious guy.


Not the kid..the Tree. Although that kid is pretty precious too.
It's our Charlie Brown Christmas Tree!
 We decided to get a potted tree that we can plant at the new house when the holiday season in all over.
I'll admit that our son cried when he first realized that this was THE TREE we would have.  "It isn't a Christmas tree" he said.  Then we attempted to convince him that this was a special tree and we would have it forever (if we don't kill it that is).  He now loves it and can't wait to see it when he gets home from school.

You may notice it's missing ornaments?
We also decided to make it more special by only putting meaningful decorations on it.

I was blessed enough to get to go to a "Meaningful Christmas" party last night.
Have you heard of this?  
Two moms Carrie and Brittney decided to write a small book to help families walk through a 24 day advent devotional.  There is a scripture for each day and quick little devotional for your family to do together. Just to make it even better there is a special ornament devoted to that scripture!  How awesome is that?

One of my girlfriends decided to organize a party where 24 of us got together and made an ornament that we thought represented the scripture that we were given.

This was my interpretation of my scripture.
Can you guess which scripture it was?


John 8:12
When Jesus spoke again to the people he said, "I am the light of the world.  Whoever follows me will never walk in the darkness, but will have the light of life."

I googled the heck out of "meaningful Christmas light of the world ornament" and didn't come up with much so I had to get creative(or got to;)!

I had a crafting fail when I attempted to make a "world" with a clear glass ornament and some craft paint.


In this pick my world was still looking awesome but I added a little water to spread everything around better and it still hasn't dried...Days later.  My intention was to somehow attach these little battery operated lights to the top so the fake flame would light up the world but I couldn't for the life of me figure out how to make it happen.  I tried a couple of different glues but just didn't get it right.  I think it could be really cool but I just didn't have time to do all of this with 24+ ornaments.


I also attempted to use the tops of the glass ornaments I bought as a "crown" per say on the "candle".
I thought it looked cool but I didn't want to have a bunch of glass ornaments without their tops and when I found packages of just the tops at Michaels they were all different sizes.  This could still be a great option for someone as you can easily puncture a whole in the middle of the metal top and then glue it upside down over the flame.


Anywho it was back to the drawing board and Hobby Lobby for me.

Thankfully I spied these little glass nativity scenes for 50% off of $1.99.


 I purchased some glittery silver ribbon, attached it to each candle

then I ended up just hot gluing the it all together.

HELPFUL HINT:  These babies ain't gonna hold up!  I didn't have time to do it but I'm thinking model glue may be better for this.   It just has a 2 hour drying time:(.  I would also try to buy electric candles that are flat or smooth on top as mine had a ridge that caused an issue with every variation of this ornament I attempted;)  I mean really it wouldn't be a craft without a couple of craft fails in the process would it?

So I warned all the lovely ladies that these may very well fall apart but at least it wouldn't be the glass that falls;)  They are all prepared to attempt to glue it back together if this happens!  


So what do you think?  Isn't this a fun party to kick of the season.  Our kids are so excited about these ornaments and I'm so excited to have a special tree that only has these very special ornaments on it!


Photobucket

Tuesday, November 20, 2012

A little construction update

There is a lot happening these days.  Funny thing is it still feels like it's at a snails pace.  We are supposed to move out of our rent house at the end of this month...So uh by next weekend.  Talk about adding a little stress to the holidays!  The plan has been to move into pods and then live with the inlaws but we began second guessing that decision as we were trying to pack and can't figure out how on earth it's all going to fit and what to pack and what to pack....yadda yadda.  So that is where our mental state is at the moment.  Crazy!  

In the meantime the stucco guys have finally gotten to work.  They started and then their mixer broke and we haven't seen them in a while.  


This is what they call the skim coat of concrete and sand.  The final coat will have the paint color incorporated and honestly I think it's going to look a lot like this skim coat when it's done but I've been wrong before.


We had to have 75 % stone per the HOA and they considered stucco stone so we went with a stone and stucco mix on the exterior.  Would have loved all stone but man rock is expensive! Our goal is to have a smooth more modern looking stucco so it doesn't move towards looking spanish.


Another big decision and issue this week was the mantle.  You see we bought this 100 year old piece of oak that we wanted to use.  The problem is it is not perfectly straight nor level.


The white on the end is just sheet rock dust.  It's a really cool old piece of wood.  It's super heavy so it had to be bolted into a header from the back of the fireplace before they could finish sheet rocking. 

The first mission was to establish how high we wanted it.  It was temporarily bolted in so we could take a look.  This is my sad attempt at showing the hubs how high it was while he was away for work.  It was also my attempt at comparing it's height with our mantle at the rent house since I didn't have a tape measure on me;)

Apparently I told the subs something different than what hubs told them so there was some slight confusion.  Silly little things like how high and which side goes on top can hold things up and that has happened quite a bit.  I think it is just part of it?  


If you follow on facebook you've already seen these sneak peeks because I just can't help myself.
As you can see they got busy on the sheetrock too!


Here is the master bathroom before the taping and floating.  I'm still trying to figure out where to put what tile and where to start and stop it in this bathroom.  I really need to figure this out like tomorrow(but I'll be at work) sooo....I'm hoping for a vision tonight.

Some of these are phone pics on a cloudy day.  I think it's going to be brighter than this in the master bath or at least I'm hoping!


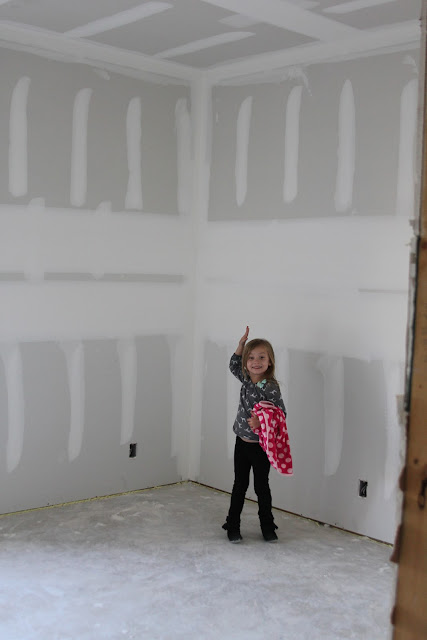
Now that's more like it!  Here is "boogers" showing of her light and bright room that's been taped and floated.  Yay for progress shots!  I can't tell you how disappointed we were to come out to the job site for weeks and each and every time be disappointed that nothing was happening.


This pic below is what keeps us going.  Visions of the kids out and about  and exploring their surroundings is motivation enough to keep our heads up and know that soon enough we can move in and settle in to to make lots of memories here!


Next up: Texture on the walls, finishing stucco and dealing with some extra cabinet costs we've run into.  Fingers crossed it happens this week!

Wednesday, October 31, 2012

The Master Plan

Is anybody out there?  Crickets.....
I know I know I don't post much..Actually I feel like I've been doing better lately so score for me!  
It will be so nice to move in some day and have lots of little decorating projects that I can whip up a post about.  I'm doing absolutely nothing as far as decorating or crafty stuff goes in this rent house so I'm totally relying on the construction progress.  BUT....there has been no progress on the house in over 2 weeks.  Nothin.  I know it will all work out in the end and we will be so happy to move in and get settled but I'm really nervous about the next 4 1/2 weeks.  Why?  Because we have to move out of our rent house!  Our lease has been extended to the max and we may very well be moving into an unfinished home.  As long as we have heat and running water I'm ok with that.  We have lived for a year without a kitchen so why not;)  Nervous smirk inserted here.

That being said I wanted to share which way we are going with the master bathroom.
Here is the vanity that we had Wilson (the architect) draw up.


We wanted it to be simple and it will probably be stained to be a little rustic.

A couple of months ago we found this hutch below at a warehouse sale and thought it would be great in our master bath on a wall that we had planned for cabinets.  So we nixed the cabs and are going to go this route.


Can't you just picture big fluffy white towels all rolled up in there?

Along with some rustic wood we will have concrete countertops.  Way back in our younger days (2003 to be exact;) we made our own concrete countertops for our guest bath.  That was back before I even knew what a blog was so there is no tutorial or detailed pics but you can check it out here.


As far as the other details go they are a little up in the air.  Although I have been searching for fun yet affordable tile for what seems like months I still don't have it nailed down:(
I did however fall in love with this tile display a few months ago.  My initial thought was to do this herringbone pattern on the large wall that will be behind the shower and tub.


Then I found out it would cost $300 more to do this pattern.  Either way I think it will look awesome in an unexpected place in the bathroom.  So when I found it on clearance for 1.50 sq foot I bought what they had and I'm praying it is enough.
While I was checking out we realized it isn't the exact tile that was on the display and is actually a bit darker but I think it will still work and it measures up with my 1.50 sq foot tile budget.  That's right...that is our sad little tile budget.  Do you know how hard that is to do?

So here is the darker wood tile along with a Carrera marble penny tile for the shower floor and either this frosted brick or shiny clear brick tile as accents. 


I'm still trying to figure out the layout.  It isn't just falling into place that is for sure.

I came across this picture and it reminded me of some of the tones and textures we are going to end up with.  
Wood, marble, concrete and pendent lights.

Source: birchandbird.com via Laura on Pinterest

I also came across these tiles below. I may very well nix the small brick tiles and just go with these larger Carrera subway tiles but there is just something about the modern look of the smaller glass tiles that I can't let go of.  Oh the suspense of what we will choose!  HA!


This is just a closer yet blurrier look of the wood tiles and frosted little guys.


While my search was on I also threw this waterfall tile and white penny tile together and really like the look but I don't think this is the route we want to go in the master.  Maybe someday we can use these beautiful tiles in another bathroom.


I'm thinking my tastes will have changed by then though because I have a feeling me and my man aren't going to want to think about tile again for another 10 years at least!

So what do you think?  Have you used the wood look tiles before?  We almost used them in our last house but I was afraid for some reason.  Hm?  Guess I've overcome at least one of my fears in decorating..Or have I?
Photobucket

Monday, October 22, 2012

Sneak Peek at the Kitchen Plans

Howdy homebodies!  Amidst all the minor yet major decisions we are making for the construction of our casa we do occasionally get a glimpse of how things will actually turn out!  What do I mean you ask?  Well a lot of what we are doing is just imagining how this and that will look and if it will work.  But....we decided we needed to get specific about our kitchen cabinets in order to avoid any mistakes once they are being built.  So we hired Wilson the architect again to draw up exactly what we are looking for in the cabs.  This is something we previously thought we could just draw out and talk to the cabinet guy about but we have had so many hiccups that we don't want to chance any miscommunication.  Wanna see what we are shooting for?


Ah AAAAA!  This is the main wall of cabinetry that sits behind our island.  I wanted the fridge to look as "built in" as possible so we took the cabinet above the fridge up to the ceiling and it juts out to the edge of the refrigerator too.  On the right side you will see the cabinets go from floor to ceiling to not only imitate the left side and create symmetry but they also jut out a bit on the countertop and create an appliance garage!  We will have a couple of shelves in there.  One shelf will house our microwave and then we can keep our toaster, big mixer, and any other gadgets in the lower section.  These doors will hopefully slide in on each side and look a lot like this....

                                                              Source: bhg.com via Jessica@ Hill Country Homebody on Pinterest


Here is how it all looks from up above.  The main wall of cabinetry is back behind the island.


The main area of the kitchen faces these windows which will be where the dining table sits. We can't wait to clean up those trees a bit more and see what we will be able to see while we scrub the dishes.  


I'm going to show you the other options we considered going with the kitchen cabinets and the bathrooms too.  But first I HAVE to make a decision on the master bathroom tile..It shouldn't be so hard but there are so many choices.  Check back soon!

Photobucket